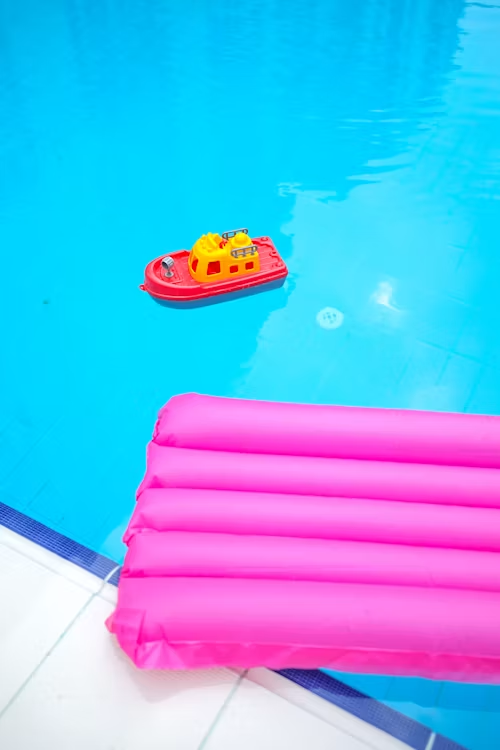
Every summer it’s the same story. The floats come out, the fun begins, and somewhere around week two the pool float storage situation completely falls apart. A deflated unicorn is draped over the fence. The inflatable pizza slice is slowly dying behind the shed. Three pool noodles have gone rogue across the yard. Sound familiar?
You’re not disorganized — you just don’t have a system. And once you have one, maintaining it takes about ninety seconds after each swim session.
Why Pool Float Storage Is More Important Than People Realize
Most people treat float storage as an afterthought — something to figure out at the end of summer when they’re shoving everything into a bin and hoping for the best. But how you store your floats actually has a direct impact on how long they last, how much yard space you lose during summer, and honestly, how your entire pool area looks and functions.
Here’s the part that surprised me when I first started paying attention to it: UV exposure and trapped moisture are the two biggest killers of inflatable pool toys, and both of them are entirely preventable with proper storage. Leaving floats out in direct sun when they’re not in use — even for a few days — degrades the vinyl faster than almost anything else. Sun-weakened vinyl develops microtears, loses its flexibility, and eventually starts leaking at seams that should last for years.
The second issue is mold. If you’re storing floats that haven’t been properly dried, especially in enclosed bins or sheds, you’re creating the exact environment mold needs to grow. By the time you pull them out next summer, they smell musty, look grimy, and sometimes have actual mold blooms in the folds.
Good storage solves both problems. It’s not just tidiness — it’s actually an investment in not having to replace your floats every single season.
The Best Pool Float Storage Solutions, Ranked by How Well They Actually Work
Let me walk through the real options here — not just what looks good in a product photo, but what holds up through an actual summer with kids, guests, and weekend chaos.
Large Deck Boxes: The Reliable Workhorse
If you want one solution that handles everything — floats, noodles, pool toys, towels, sunscreen — a large deck box is the most practical answer for most households. The good ones are UV-resistant, have ventilation to prevent moisture buildup, and can double as extra seating near the pool.
Look for deck boxes rated at 150 gallons or more if you’re storing full-size inflatable floats. Anything smaller and you’ll be folding floats awkwardly or leaving the lid propped open, which defeats the purpose.
The downside is aesthetic — deck boxes are functional and utilitarian. They work incredibly well, but they’re not something you’d describe as attractive. If the visual side of your pool area matters to you, this probably isn’t your first choice.
Best for: Families with lots of gear, people who want a single solution that handles everything, pools where aesthetics aren’t the priority.
Freestanding Hammock Net Bags
These are one of the most popular pool float storage options on Pinterest right now, and with good reason — they actually look good. A large hammock-style net bag hung between two posts, a fence, or a pergola beam creates this relaxed, resort-feel storage spot that works visually even when it’s full of floats.
The mesh design solves the drying problem beautifully — air circulates completely, so floats dry fast and mold has nowhere to take hold. They’re also surprisingly easy to make yourself if you’re handy with basic hardware; a cargo net from a hardware store and two screw hooks is genuinely all you need.
The limitation is capacity for odd-shaped items. Large inflatable flamingos and oversized lounger floats don’t always cooperate with net bags. Works better for pool noodles, smaller floats, and beach balls than for the giant novelty floats.
Best for: Smaller float collections, people who care about the visual side of their pool area, renters or people who don’t want a permanent structure.
Wall-Mounted Racks and Hooks
For pool noodles specifically, a wall-mounted rack is the cleanest, most satisfying solution. You’ve probably seen the PVC pipe rack builds on Pinterest — basically a frame of PVC pipe mounted to a wall or fence with individual slots that each hold one noodle upright. They keep noodles organized, off the ground, and dry between uses.
The same principle works for hooks. A row of heavy-duty outdoor hooks mounted to a fence or exterior wall can hold deflated floats hung over them, keeping everything visible and accessible without taking up floor space.
This approach works best as part of a larger system rather than as a standalone solution — great for noodles and smaller items, but doesn’t solve the problem of where to put large inflatables.
Best for: Noodle organization, people with fence or wall space near the pool, anyone who wants a DIY project that actually makes a difference.
Rolling Utility Carts
This is my personal favorite for households with a lot of pool gear. A large outdoor rolling utility cart — the kind with multiple shelves or a big basket — lets you organize everything and move it around as needed. After swimming, you wheel it into the shade or into the garage. Before guests arrive, you wheel it poolside.
The mobility factor is underrated. Pools get rearranged — furniture moves, shade shifts, families reorganize their outdoor layout. A rolling cart adapts to all of that in a way that a fixed wall mount or stationary deck box doesn’t.
Look for carts made of rust-resistant materials if they’re going to live outside. Resin and powder-coated steel hold up well; bare metal will rust faster than you’d expect in a humid outdoor environment.
Best for: People who want flexibility, larger families with varied gear, anyone with a garage or covered area nearby to roll things into.
A Dedicated Pool Float Storage Station (The Pinterest Approach)
If you want something that looks intentional and styled — the kind of setup that gets photographed for a pool party post — a dedicated storage station is worth building. The basic concept: combine a large galvanized metal trough or wooden crate for oversized floats, wall hooks or a rack for noodles, and a smaller bin or basket for small toys, goggles, and accessories.
The key to making this look good rather than chaotic is containing each category in its own designated spot. When everything has a place and goes back to that place, the whole area looks organized even in the middle of summer.
Label the bins if you have kids who are responsible for putting their own stuff away — it removes the ambiguity that leads to “I didn’t know where it went” and everything ending up on the ground.
How to Prep Floats for Storage So They Last Longer
This section could genuinely save you money, because how you store floats matters as much as where you store them.
Rinse before storing. Pool chemicals — chlorine especially — degrade vinyl over time when left sitting on the surface. A quick rinse with the garden hose before you deflate and store adds months of life to your floats.
Dry completely before deflating. This is the one most people skip because it feels unnecessary. But moisture trapped inside a deflated float is what creates mold. Leave inflatables out in the shade (not direct sun — sun degrades vinyl) for 30–60 minutes after rinsing before you deflate them. Or partially inflate them and let them air dry before sealing the valve.
Fold loosely, not tightly. Tight, rigid folds in the same place every time create crease lines that eventually become weak spots and cracks. If you can store floats loosely rather than folded flat, do it. If you have to fold, alternate the fold direction each time.
Store away from direct sun and extreme heat. A shed that gets to 120 degrees Fahrenheit in July is worse for vinyl than leaving floats outside. If you have a temperature-regulated garage, that’s your best option. Otherwise, a shaded outdoor storage spot beats a superheated enclosure.
Keep heavy items off floats. Stacking other gear on top of stored inflatables creates pressure points that eventually cause leaks. Store floats on top or in their own space where nothing is pressing down on them.
DIY Pool Float Storage Ideas Worth Actually Building
If you enjoy a weekend project and want to create something custom for your space, a few DIY options are genuinely worth the time:
The PVC Noodle Rack — Cut PVC pipe into 12-inch sections, attach them horizontally to a backing board or directly to a fence, and you have individual cubbies for pool noodles. Takes about two hours and costs under $30. Looks clean, lasts for years, and completely solves the noodle chaos problem.
The Galvanized Trough Station — A large galvanized livestock trough (available at farm supply stores for much less than comparable “decorative” outdoor storage at home improvement retailers) makes an excellent float container. It’s rust-resistant, looks intentionally rustic, and holds multiple large floats without any folding. Add a few drainage holes to the bottom and it’ll dry itself out after rain.
The Hanging Cargo Net — Cargo nets with carabiner clips are available online for around $20–$40 depending on size. Two large eye bolts in a fence or between posts, and you have a net storage system that holds an impressive amount of gear, dries everything naturally, and looks deliberately bohemian rather than accidentally messy.
End-of-Season Storage: Getting This Right Saves You Next Summer
The way you store pool floats at the end of the season determines how they look when you pull them out in June. A little extra effort in September pays off significantly.
Wash everything with mild soap and water — not just a rinse, an actual wash. Rinse thoroughly, then dry completely in the shade. Deflate fully, fold loosely, and store in a breathable bag or open bin somewhere temperature-stable: a climate-controlled garage, an interior storage closet, or a basement. Not a shed that freezes in winter — extreme cold makes vinyl brittle and prone to cracking.
Repair any small leaks now, before winter. A tiny pinhole in September becomes a frustrating deflation problem in June. Vinyl repair kits cost a few dollars and take five minutes to use on a dry, clean surface. Future you will be very grateful.
Getting your pool float storage sorted isn’t the most glamorous project of the summer. But it’s one of those things that quietly improves every swim day for the rest of the season — no hunting for gear, no damaged floats, no cluttered yard making the whole space feel chaotic. Ten minutes of organization today, and the pool area actually looks like somewhere you want to spend time.
That’s worth it.